Form validation methods

From my experience, I already use 3 main type of method to validate a form. Purpose of form validation is to prevent spamming, injection and empty message. In addition, this will make our form more friendly, safe and interactive.


Method is use :

1. JavaScript validation.
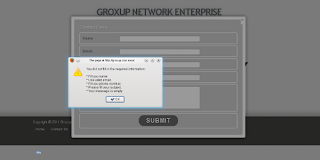
Integrated on the form web pages, refuse the submit form if the required fields is empty or out of criteria. This will pop-up a message window. We can this, on web page validation.

2. PHP script validation.
Add-on some validation script on the PHP file which processing the form output and send the mail. Then, redirect user to the corresponding page. We can say, this is on server validation.

3. Using captcha.
This method required user to fill some validation code to continue sending the form. Now a days, there was a lot of type of captcha. You can built and customised you own captcha or use free recaptcha. E.g: Recaptcha - Stop spam. Read books. We can say, this is a complete solutions for form validation; on web page and on server validation.


Next, I'll write a simple tutorial about applying this three methods of validating  a form.
Have a nice day!

Write by Arafa Daming

Google new feature - +1 (Plus one)

Google has lunch new feature to compete Facebook Like Button named +1 (Plus One) button. This feature automatically integrated on my blog. You also can customized it's position on your blog. It also available as a WordPress Plugin.

You can view +1 button FAQ here

This is short explanation of +1 button by Google :

+1 is as simple on the rest of the web as it is on Google search. With a single click you can recommend that raincoat, news article or favorite sci-fi movie to friends, contacts and the rest of the world. The next time your connections search, they could see your +1’s directly in their search results, helping them find your recommendations when they’re most useful.

Have a try!

Write by Arafa Daming

Enabling HTML5 on Internet Explorer (IE) with javascript

Create new HTML5 elements for Internet Explorer (IE) using javascript. Save this script as a javascript(e.g: html5.js) and include in your web pages.

This script should load before any others. We want the new elements to be parsed before pretty much anything happens.

document.createElement("article");
document.createElement("aside");
document.createElement("audio");
document.createElement("canvas");
document.createElement("command");
document.createElement("datalist");
document.createElement("details");
document.createElement("embed");
document.createElement("figcaption");
document.createElement("figure");
document.createElement("footer");
document.createElement("header");
document.createElement("hgroup");
document.createElement("keygen");
document.createElement("mark");
document.createElement("meter");
document.createElement("nav");
document.createElement("output");
document.createElement("progress");
document.createElement("rp");
document.createElement("rt");
document.createElement("ruby");
document.createElement("section");
document.createElement("source");
document.createElement("summary");
document.createElement("time");
document.createElement("video");


Example :

<!--[if lt IE 9]>
<script type="text/javascript" src="js/html5.js"></script>
<link rel="stylesheet" href="css/ie.css" type="text/css" media="screen" />
<![endif]-->

This is very usefull if you want to develop a HTML5 web pages.
Have a nice day!

Write by Arafa Daming

Make a simple rounded button with CSS

Minimizing the image usage on our web page is to reduce our page size and become easily to load. Usually, we are using an image as a fancy button. Now, with CSS3 new features, we can reduce images on our pages.

Example:

I'm a button

HTML code:

<a href="#" class="mybutton" title"I am a button">I'm a button</a>
CSS code:
 .mybutton  {
    border-right:1px solid #25839a;
    border-bottom:1px solid #25839a;
    padding:0px 16px;
    color:#fff;
    font-size:18px;
    line-height:38px;
    font-family:"Trebuchet MS", Arial, Helvetica, sans-serif;
    background:#ff6117;
    border-radius:10px;
    -moz-border-radius:10px;
    -webkit-border-radius:10px;
    text-decoration:none;


Hover code (Optional) :
 .mybutton:hover  {
    background:#6d777e;
    border-right:1px solid #6d777e;
    border-bottom:1px solid #6d777e;
    }


Write by Arafa Daming

All type of error page.

Do you always see some numbers which you do not understand when browsing some website?

Let's see what does each of these numbers means.

Client Request Errors
400 - Bad Request
401 - Authorization Required
403 - Forbidden
404 - Not Found
405 - Method Not Allowed
406 - Not Acceptable (encoding)
407 - Proxy Authentication Required
408 - Request Timed Out
409 - Conflicting Request
410 - Gone
411 - Content Length Required
412 - Precondition Failed
413 - Request Entity Too Long
414 - Request URI Too Long
415 - Unsupported Media Type


Server Errors
500 - Internal Server Error
501 - Not Implemented
502 - Bad Gateway
503 - Service Unavailable
504 - Gateway Timeout
505 - HTTP Version Not Supported


Write by Arafa Daming

Tools for a webmaster

A web master is a person who is responsible to manage and maintain a web pages/blog. He/she also need to make sure that the web pages/blog are indexed on the search engine. Of course, search engine will try index every web pages/blog on the internet, but it will take time and indexed a few page or every page of your web/blog.

What a webmaster need to do is to submit a site map to the search engine so that the search engine will index the web pages/blog immediately. He/she also can limit the site map to prevent the search engine to indexed unnecessary pages of the web/blog.

There are 3 major search engine that provide free webmaster tools
  1. Google : Google Webmaster tools
  2. Yahoo : Yahoo Site Explorer
  3. MSN : Bing Webmaster tools
Webmaster should use this tools wisely. A webmaster also should know how to find/create the right site map.

Write by Arafa Daming

Make a pop-up box like Facebook box

Someone ask me how to create a pop-up box as a notice to visitor. Then, I suggested jQuery to him i found this jQuery plugin (Facebox)

Now, I'll write tutorial about how to apply this plugin.

First, you need to enclose jQuery and this plugin to your page :
<script src="jquery.1.4.4.min.js"></script>
<script src="facebox.js"></script>
And then the jQuery script
<script language="javascript">
$(document).ready(function() {
 $.facebox.settings.opacity = 0.5;
 $('a[rel*=facebox]').facebox();
 $.facebox('This message will pop-up when the page loaded');
});
</script>

Put all this code in the HTML <head> tag.
Done. Have a try!
Visit the official site for more info.

Write by Arafa Daming

Make a background gradient with CSS (CSS3).

This is another feature of CSS3 and this is awesome.

Example :

CSS3 Gradient background.


CSS code:
#gradient {
    background: -moz-radial-gradient(center, #f4fafe, #a2d2ed) no-repeat #a2d2ed;
    background: -webkit-gradient(radial, 50% 50%, 0, 50% 50%, 500, from(#f4fafe), to(#a2d2ed)) no-repeat #a2d2ed;
    background: gradient(radial, 50% 50%, 0, 50% 50%, 500, from(#f4fafe), to(#a2d2ed)) no-repeat #a2d2ed;
}
 Have a try! :D

Write by Arafa Daming

Remove dotted line (outline) on the clicked link

Remove dotted line (outline) on the clicked link

There will a dotted line around the link after you click on it. To remove that dotted line, simply apply this CSS script :

a:focus {
  border: 0;
  outline: none;
}
Have a try! :D

Write by Arafa Daming

[Basic Web Design] Final - The page footer

For this footer, I'll put some background at the bottom left and align the text to the right.
<footer>
<p><a href="#">Home</a> | <a href="#">About Me</a> | <a href="#">Portfolio</a> | <a href="#">Contact Me</a></p>
<p>© 2011 <a href="http://www.arafa-daming.co.cc" target="_blank">Arafa Daming</a></p>
</footer>
The style code :
footer {
    width: 950px;
    height: 50px;
    margin: 10px auto;
    background: #fff url(images/footer-bg.png) no-repeat bottom left;
    border: 1px solid #ccc;
    border-radius: 10px;
    -moz-border-radius: 10px;
    -webkit-border-radius: 10px;
    }

footer p {
    text-align: right;
    margin: 0;
    padding-right: 20px;
    font-size: 12px;
    }

footer p a {
    text-decoration: none;
    color: #000;
    }

footer p a:hover {
    text-decoration: underline;
    }
Finish! You can view demo at here.

Write by Arafa Daming

[Basic Web Design] Part 7 - Styling web content (sub-content)

For the sub-content, I'll put a background for the title and customizing the paragraph.

  <aside id='left-side'>
  <!--Left side content-->
  <h3>Lorem Ipsum</h3>
  <p>Lorem Ipsum is simply dummy text of the printing and typesetting industry.<img src="images/rss.png" width="48" height="48">Lorem Ipsum has been the industry's standard dummy text ever since the 1500s, when an unknown printer took a galley of type and scrambled it to make a type specimen book.</p>
  </aside>
Then style up the content :

#left-side h3 {
    font-family: Arial, Helvetica, sans-serif;
    font-size: 20px;
    padding-left: 50px;
    text-shadow: 0 1px 0 #ccc,
    0 2px 0 #c9c9c9,
    0 3px 0 #bbb,
    0 4px 0 #b9b9b9,
    0 5px 0 #aaa,
    0 6px 1px rgba(0,0,0,.1),
    0 0 5px rgba(0,0,0,.1),
    0 1px 3px rgba(0,0,0,.3),
    0 3px 5px rgba(0,0,0,.2),
    0 5px 10px rgba(0,0,0,.25),
    0 10px 10px rgba(0,0,0,.2),
    0 20px 20px rgba(0,0,0,.15);
    background: url(images/icon2.png) no-repeat 12px 0;
    }

#left-side p {
    text-indent: 30px;
    padding: 20px;
    }

#left-side p:first-letter {
    font-size: 20px;
    font-weight: bold;
    }

#left-side img {
    float: right;
    margin: 10px;
    }
 Done!

Write by Arafa Daming

[Basic Web Design] Part 6 - Styling web content (Highlight)

6For this highlight, I'll apply simple image sideshow using jQuery.

First, include j query to your page, paste this code on <head> tag :

<script src="http://ajax.googleapis.com/ajax/libs/jquery/1/jquery.min.js"></script>
<script>
Put the image on the highlight section :

<section id='highlight'>
<!--Highlight-->
<img src="images/slide1.png" width="950" height="300">
<img src="images/slide2.png" width="950" height="300">
<img src="images/slide3.png" width="950" height="300">
</section>
Give it style, put this on the <style> tag :

#highlight img { position:absolute; left:0; top:0; }
Lastly, put this script on the <head> tag :

<script>
$(function(){
    $('#highlight img:gt(0)').hide();
    setInterval(function(){$('#highlight :first-child').fadeOut().next('img').fadeIn().end().appendTo('#highlight');}, 3000);
});
</script>
Done!

Write by Arafa Daming

[Basic Web Design] Part 5 - Styling web content (Navigation)

We are suing unordered list for navigation :

<nav>
<!--Navigation-->
<ul>
    <li><a href="#">Home</a></li>
    <li><a href="#">About Me</a></li>
    <li><a href="#">Portfolio</a></li>
    <li><a href="#">Contact Me</a></li>
</ul>
</nav>
Then give it some style :

ul {
    margin: 15px 0 0 20px;
    padding: 0;
    list-style: none;
    }

ul li {
    display: block;
    }

ul li a {
    float: left;
    width: 200px;
    margin: 0 10px;
    text-decoration: none;
    text-align: center;
    font-weight: bold;
    color: #666;
    background: #d2f4f5;
    border: 1px solid #ccc;
    border-radius: 10px;
    -moz-border-radius: 10px;
    -webkit-border-radius: 10px;
    }

ul li a:hover {
    color: #d2f4f5;
    background: #666;
    }
Done!

Write by Arafa Daming

[Basic Web Design] Part 4 - Styling web content (Header)

In header, i only use 3D text effect(CSS3) and one image as a background.

<header>
<!--Page title & description-->
<h1>Basic Web Design</h1>
<h2>First web design tutorial by me :D</h2>
</header>
Add this CSS code to the <style> tag :

h1 {
    font-family: Tahoma, Helvetica, sans-serif;
    font-size: 40px;
    padding-left: 30px;
    text-shadow: 0 1px 0 #ccc,
    0 2px 0 #c9c9c9,
    0 3px 0 #bbb,
    0 4px 0 #b9b9b9,
    0 5px 0 #aaa,
    0 6px 1px rgba(0,0,0,.1),
    0 0 5px rgba(0,0,0,.1),
    0 1px 3px rgba(0,0,0,.3),
    0 3px 5px rgba(0,0,0,.2),
    0 5px 10px rgba(0,0,0,.25),
    0 10px 10px rgba(0,0,0,.2),
    0 20px 20px rgba(0,0,0,.15);
    }

h2 {
    font-family: Tahoma, Helvetica, sans-serif;
    font-size: 20px;
    padding-left: 50px;
    text-shadow: 0 1px 0 #ccc,
    0 2px 0 #c9c9c9,
    0 3px 0 #bbb,
    0 4px 0 #b9b9b9,
    0 5px 0 #aaa,
    0 6px 1px rgba(0,0,0,.1),
    0 0 5px rgba(0,0,0,.1),
    0 1px 3px rgba(0,0,0,.3),
    0 3px 5px rgba(0,0,0,.2),
    0 5px 10px rgba(0,0,0,.25),
    0 10px 10px rgba(0,0,0,.2),
    0 20px 20px rgba(0,0,0,.15);
    }
I put some image at he bottom-right of the header.

header {
    width: 950px;
    height: 150px;
    margin: 5px auto;
    background: #fff url(images/banner_design.png) no-repeat bottom right;
    border: 1px solid #ccc;
    border-radius: 10px;
    -moz-border-radius: 10px;
    -webkit-border-radius: 10px;
    }
Done! A simple header is ready.

Write by Arafa Daming

[Basic Web Design] Part 3 - Styling web layout

Now, we are going to styling web layout and we can see how its look.

Add this style at the <head> tag (After <title> tag)

<style>
body {
    background: #F5F4EF;
    color: #000305;
    font-size: 87.5%; /* Base font size: 14px */
    font-family: 'Trebuchet MS', Trebuchet, 'Lucida Sans Unicode', 'Lucida Grande', 'Lucida Sans', Arial, sans-serif;
    line-height: 1.429;
    margin: 0;
    padding: 0;
    text-align: left;
    }
/* Enabling HTML5 tags */
header, section, footer, aside, nav, article, figure {
    display: block;
    }

header {
    width: 950px;
    height: 150px;
    margin: 5px auto;
    background: #fff;
    border: 1px solid #ccc;
    border-radius: 10px;
    -moz-border-radius: 10px;
    -webkit-border-radius: 10px;
    }

nav {
    width: 950px;
    height: 50px;
    margin: 0 auto;
    background: #fff;
    border: 1px solid #ccc;
    border-radius: 10px;
    -moz-border-radius: 10px;
    -webkit-border-radius: 10px;
    }

/***** Hightlight Section *****/
#highlight {
    width: 950px;
    height: 300px;
    margin: 10px auto;
    background: #fff;
    border: 1px solid #ccc;
    border-radius: 10px;
    -moz-border-radius: 10px;
    -webkit-border-radius: 10px;
    }

/***** Content Section *****/
#content {
    display: table;
    margin: 0 auto;
    width: 950px;
    }

/***** Left Aside *****/
#left-side {
    display: table-cell;
    float: left;
    width: 450px;
    height: 250px;
    background: #fff;
    border: 1px solid #ccc;
    border-radius: 10px;
    -moz-border-radius: 10px;
    -webkit-border-radius: 10px;
    }

/***** Right Aside *****/
#right-side {
    display: table-cell;
    float: right;
    width: 450px;
    height: 250px;
    background: #fff;
    border: 1px solid #ccc;
    border-radius: 10px;
    -moz-border-radius: 10px;
    -webkit-border-radius: 10px;
    }

/***** Footer *****/
footer {
    width: 950px;
    height: 50px;
    margin: 10px auto;
    background: #fff;
    border: 1px solid #ccc;
    border-radius: 10px;
    -moz-border-radius: 10px;
    -webkit-border-radius: 10px;
    }
</style>
Done. You can fill the web layout with your content

Write by Arafa Daming

[Basic Web Design] Part 2 - Constructing web layout

The basic markup :
<!DOCTYPE html>
<html>
<head>
<title>Basic Web Design</title>
<head>
<body>
</body>
</html>
Save it as index.html and we already create HTML 5 document. Now, create the web main section into <body> tag :

<header>
<!--Page title-->
</header>

<nav>
<!--Navigation-->

</nav>

<section id='highlight'>
<!--Highlight-->
</section>

<section id='content'>

   <aside id='left-side'>
   <!--Left side content-->
   </aside>

   <aside id='right-side'>
   <!--Right side content-->
   </aside>
</section

<footer>
<!--Footer here-->
</footer>
Next, we will applying style(section width, height, border etc) to this section using CSS3.

Write by Arafa Daming

Defination of Web 1.0, Web 2.0 and Web 3.0

Web 1.0
  1. The first generation of the World Wide Web, characterized by separate static websites rather than continually-updated weblogs and social networking tools.
  2.  One-way broadcasting, meaning only the owner of the site can publish information.
  3.  Web 1.0 (1991-2003) is a retronym which refers to the state of the World Wide Web, and any website design style used before the advent of the Web 2.0 phenomenon.
  4.  Refers to the first stage of the World Wide Web linking web pages with hyperlinks.
Example : Static Page


Web 2.0
  1. The term Web 2.0 is associated with web applications that facilitate participatory information sharing, interoperability, user-centered design, and collaboration on the World Wide Web.
  2. The second generation of the World Wide Web, especially the movement away from static web pages to dynamic and shareable content and social networking
  3. Web 2.0 does not refer to any specific change in the technology of the Internet, but rather the behavior of how people use the Internet.
  4. Web 2.0 (or Web 2) is the popular term for advanced Internet technology and applications including blogs, wikis, RSS and social bookmarking.
  5. user interaction / behaviour
Example :You-Tube and it user, Facebook

Web 3.0
  1. The predicted third generation of the World Wide Web, usually conjectured to include semantic tagging of content.
  2. The creation of high-quality content and services produced by gifted individuals using Web 2.0 technology as an enabling platform.
  3. Access internet any time, any where, any device.
Example : Surfing Web 3.0 at your smart phone.


Please note that :
  • Don't "use", "build" or "design" web 3.0. They do not represent any look and feel. 
  • Web 2.0 & 3.0 are terms that cater for those who don't have clear understanding about the internet. 
  • If someone says "I want a web 3.0 website", "I want to make my site design looks like web 2.0" will only make people laugh, especially those who are internet savvy.

Have a nice day!

Write by Arafa Daming

Hide and show floating button or box

Just now, i made a floating box for advertisement in my blog. My friends ask me how to that, and now, I'll write a tutorial for that.

Actually, it's use same concept as floating site button that i do before. Using jQuery and fixed position for div. With jQuery, we can hide and show the floating box(div). You can see the example at the bottom right corner of my blog.

Go to your Blogger Dashboard, Choose Design and Edit HTML.


1. First, the most important is jQuery, add jQuery to your site by add this code :

<script src='http://ajax.googleapis.com/ajax/libs/jquery/1.4.2/jquery.min.js' type='text/javascript'/>

paste this code below "//]]>"


2. Second, add the floating box to your page. Paste this code before </body> tag :

<div id='show-ads'><a class='show_ads' href='#'><img border='0' src='http://4.bp.blogspot.com/-BvB09OYSv6k/TcIb44DlnrI/AAAAAAAAAJk/jyCLo4TUgNc/s1600/back_blue_button.png'/></a>
</div>

<div id='float-right'>
<a class='close_ads' href='#' style='font-size:large;' title='Close this ads'><img border='0' src='http://2.bp.blogspot.com/-hBb8a4rsAR4/TcH3FSbyoKI/AAAAAAAAAJg/X_4n5iuU8t4/s1600/button_blue_close.png'/></a><br/>
Your script here.(I copy and paste my Nuffnang ads script here)
</div>


Write by Arafa Daming

Page navigation by numbers on Blogger

By default, your blog will use Older posts, Newer Posts links at the bottom of the page. This is the main navigation for your blog post.

So, lets make it more fancy and more interesting. You can view at this blog footer for example.

Please back-up your template before editing.

1. Go to your blog dashboard then :
Setting >> Formatting
Arafa Daming - Page navigation by numbers on Blogger
Choose number of post you want to view on every page.

2. Go to Design >> Edit HTML
 Tick

Find this code : </body>
You can find it by press Alt + F and type the word.

Paste this code above the </body>


Write by Arafa Daming

[Basic Web Design] Part 1 - Draw layout

Now, we are going to make basic web design using HTML5 and CSS3. First, we need to draw the web layout.

This is my layout example. You can make your own.

Arafa Daming - Basic web design, Part 1

In this layout, i use 5 main section : header, navigation, highlight, subsection and footer
.
Have a try and draw your main layout. Next, we will write the HTML and CSS script using HTML5 and CSS3.

Write by Arafa Daming

CSS 3D Text

Example :

3D text

Code:

text-shadow: 0 1px 0 #ccc,
0 2px 0 #c9c9c9,
0 3px 0 #bbb,
0 4px 0 #b9b9b9,
0 5px 0 #aaa,
0 6px 1px rgba(0,0,0,.1),
0 0 5px rgba(0,0,0,.1),
0 1px 3px rgba(0,0,0,.3),
0 3px 5px rgba(0,0,0,.2),
0 5px 10px rgba(0,0,0,.25),
0 10px 10px rgba(0,0,0,.2),
0 20px 20px rgba(0,0,0,.15);


This is another new feature by CSS 3 (text-shadow).
Work on latest versions of Chrome, Safari, Firefox, and Opera which render multiple text-shadows on text elements.

Have a try. I already do it to my blog header. :D

Write by Arafa Daming

HTML & PHP - Make a funtioning contact form

Today, i'll make tutorial how to make a funtioning contact form. You can view sample by viewing my blog contact page.

First : The HTML 5 code.

<form action="the-php-file-url-here" enctype="multipart/form-data" id="myForm" method="post">
<fieldset>
<legend>Personal information</legend>
<label for="name">Name</label>
<input id="name" maxlength="50" name="name" size="50" type="text" value="" />
<label for="email">E-mail</label>
<input id="email" maxlength="50" name="email" size="50" type="text" value="" />
<label for="website">Website</label>
<input id="website" maxlength="50" name="website" size="50" type="text" value="" /></fieldset>

<fieldset>
<legend>Message</legend>
<label for="subject">Subject</label>
<input id="subject" maxlength="50" name="subject" size="50" type="text" value="" />
<label for="message">Yout Message</label>
<textarea cols="50" id="message" name="message" rows="5"></textarea></fieldset>

<fieldset>
<input class="button" name="send" type="submit" value="Send Message" /><input class="button" name="reset" type="reset" value="Clear From" /></fieldset>
</form>


Change the 'the-php-file-url-here' to your php file url. Embed this code to your contact page.

Second : The PHP file.


Write by Arafa Daming

[CSS3]Change text selection color

This is fantastic CSS3 effect, you can customize your selection color.
You can try select a text on this blog to see it in action.


Default Setting(for all text element):

::selection {
background:#f094b7;
color:#555;
}

::-moz-selection {
background:#f094b7;
color:#555;
}

::-webkit-selection {
background:#f094b7;
color:#555;
}


Selective Setting(for selective text element):

p.orange::selection {
background:#c2660d;
color:#fff;
}

p.orange::-moz-selection {
background:#c2660d;
color:#fff;
}

p.orange::-webkit-selection {
background:#c2660d;
color:#fff;
}


Currently FireFox, Safari, Chrome and Opera support the text section attribute, and the browsers that don’t support it simply ignore the code so nothing will break, so it doesn’t really matter.

Write by Arafa Daming

Raster and vector images

Arafa Daming - Raster Images

Arafa Daming - Vector Images


To work successfully in any graphics package, a designer need to have a fundamental understanding of raster images versus vector images. Raster images are created through the process of scanning source artwork or "painting" with a photo editing or paint program. A vector image is a collection of connected lines and curves that produce objects and created through the process of drawing with vector based program.

Now, let see the different :

Raster ImagesVector Images
ResolutionExpressed in terms of the dots per inch or dpi(pixels).Defined by math, not pixels.
File SizeHuge file sizes. Higher resolutions (dpi) and greater color depths, produce bigger file sizes.Very small in file size because do not need to keep track of each individual pixel in an image, only mathematical descriptions.
File FormatBMP (Windows Bitmap), PCX (Paintbrush), TIFF (Tag Interleave Format), JPEG (Joint Photographics Expert Group), GIF (Graphics Interchange Format) , PNG (Portable Network Graphic), PSD (Adobe PhotoShop) and CPT (Corel PhotoPAINT EPS (Encapsulated PostScript), WMF (Windows Metafile), AI (Adobe Illustrator), CDR (CorelDraw), DXF (AutoCAD), SVG (Scalable Vector Graphics) and PLT (Hewlett Packard Graphics Language Plot File)
Based ProgramCorelPhotoPaint, Adobe Photoshop CorelDraw, Adobe Illustrator
Advantage- Accurately reproduce the original source artwork.
- Raster effects (ie drop shadows, glows and some transparency interactions).
- Scale up or down without the loss of image quality.
- Easy coloring.

Have a nice day!

Write by Arafa Daming

Submit your url to the most popular directory listing

To improve our web site page rank on popular search engine, we need to submit our url or directory listing(sitemap) to directory listing site. Here is the most popular site for directory listing :
Now, i'll write the method of how we submit or url or directory in DMOZ.


Write by Arafa Daming

New HTML Tags list

Below is the list of HTML tags include HTML 5 new tags :


Write by Arafa Daming

How to use Xampp?

Today, we will install Xampp for windows on our own computer as a local web host.

What is Xampp?
XAMPP ( or ) is a free and open source cross-platform web server package, consisting mainly of the Apache HTTP Server, MySQL database, and interpreters for scripts written in the PHP and Perl programming languages. - en.wikipedia.org/wiki/XAMPP


Where to get Xampp?
You can download it from here : www.apachefriends.org
That site also provide information about how to install and manage.

How to use?
Usually, i use Xampp for testing my web pages. To test the web pages, put the file or folder at the "htdocs" folder in installed Xampp folder. For example : I create one folder of web pages named "mywebsite.com" in that "htdocs" folder.


To test the web pages, i start my Xampp and open my favorite web browser .
I just need to type this url on the web browser : "localhost/mywebsite.com" and enter.

Now, i can see preview my website on my computer. Finish!

For more infomation, read www.apachefriends.org

Write by Arafa Daming

Installing Wordpress on the web host (cPanel configuration)

You can install Wordpress on your own wb host just for 5 minute. Here i also include the cPanel configuration.

The method:

1. Download the latest Wordpress vesion here

2. Unzip the package in an empty directory and upload everything into your web host via ftp client.

3. Open wp-admin/install.php in your browser. Example : http://www.yourdomain.com/wp-admin/install.php or http://blog.yourdomain.com/wp-admin/install.php or http://www.yourdomain.com/blog/wp-admin/install.php.
You will see this page :
Arafa Daming - Install Wordpress in % minute


4. Just proceed by clicking "Create a Configuration File". Then you will see this page :

Arafa Daming - Configure Wordpress configuration file

5. Click "Let's go!". This page
will appear :
Arafa Daming - Wordpress Configuration

6. Leave this page and open a new tab. Go to your cPanel on web host. Choose "MySQL Database Wizard"

Arafa Daming - cPanel MySQL Wizard


Write by Arafa Daming

How they do phishing on Facebook (with example page)

Please note : This is for education to prevent phishing.

This tutorial will cover :
  • how they phish/spoof Facebook page (with picture)
  • how does that phishing work
  • how they sent their phisher
First : How they phish/spoof Facebook page.

They go to facebook login page and copy the source code to the notepad and save it as php file; example: faceb00k.php. The saved file will same as the original facebook login page.

Second : How does that phishing work.

They edit the saved file action to their own script. When you fill your email and password on the fake page, the email and password will be saved or sent to their email.

Third : How they sent their phisher.

They will copy facebook email and modified the mail. The link inside the email is redirect to their phishing page.Then sent the mail to your as an invitation or something else.


Do not lough or take easy for this trick. Hacker still do this method and foolish a lot of people. Please note that hacker is very smart and tricky. They got many skill and alternative to cheat you.

You can view the example phishing page here :
Fake Facebook login page.

And modified facebook email here :
Fake Facebook email invitation

This is where they store the data :
Data captured stored in .txt file or sent directly to their email.

Any inquiry? Contact me.

Write by Arafa Daming

How to make floating side button?

Arafa Daming - How to make floating button

Today, we will make an interactive floating side button which is moving to the left/right on mouse-over same as my blog side button. First, what you need is :
  • Your blog or website (This tutorial for blogger but applicable for a web page)
  • Button images
  • Yourself
You can download free button as mine at IconFinder
or you can choose your own icon.

Now, here is the method :

1. Go to Blogger dashboard, choose your blog, design and edit html. Expand widget templates.

2. Include jQuery on your web page. This is to make your button more interactive.
Find "//]]>" and paste this code below "//]]>" :

<script src='http://ajax.googleapis.com/ajax/libs/jquery/1.4.2/jquery.min.js' type='text/javascript'/>

3. Make your floating div. Paste the code before </body> tag :


<div id='float-left'>
<ul>


<li><a href='http://www.facebook.com/pai.arafa' target='_blank' title='Be My Friend on Facebook'><img alt='Be my Friend on Facebook' src='http://filex.e-labuan.com/icon/side_facebook.png'/></a></li>


<li><a href='http://twitter.com/pai_arafa' target='_blank' title='Tweet Me'><img alt='Follow Me on Twitter' src='http://filex.e-labuan.com/icon/side_twitter.png'/></a></li>


<li><a href='http://paiarafa.blogspot.com/atom.xml' target='_blank' title='RSS This'><img alt='RSS Feed' src='http://filex.e-labuan.com/icon/side_rss.png'/></a></li>


<li><a href='http://www.e-labuan.com' target='_blank' title='Joim My Community Forum Board'><img alt='Join My Community Forum Board' src='http://filex.e-labuan.com/icon/my_forum.png'/></a></li>


<li><a href='mailto:pai_arafa@yahoo.com' title='Email Me'><img alt='Email Me' src='http://filex.e-labuan.com/icon/email_me.png'/></a></li>


</ul>
</div>

<script type="text/javascript">
$(document).ready(function(){
var duration = 150; //time in milliseconds

     $("#float-left ul li a";).hover(function() {
        $(this).animate({ paddingLeft: "30px" }, duration);

        $(this).animate({ paddingLeft: "20px" }, duration);

         }, function() {
         $(this).animate({ paddingLeft: "0px" }, duration);
          });
});
</script>


4. Make a style for that floating div. Find "]]>" and paste the following code before "]]>" :

#float-left { border: 0; position: fixed; top: 100px; left: 0; z-index: 9999;}
#float-left ul { margin: 0 0 0 -40px; list-style: none;}

#float-left ul li a { display: block;}

5. Finish


p/s : This is just a simple example. You can customize more.
You place the all JavaScript  "<script>" just before </body> tag for better web page loading. This is an optional.

Next tutorial is to make "pop-up div". YEAH!!

Write by Arafa Daming

My point of view in Search Engine Optimazation (SEO)

When i start working as a web designer. I start constructing a web pages without knowing that SEO is exist. Until my boss ask me to study about SEO then i know SEO is very important to a web pages and search engine.

After some research and study about SEO, I divide it into 2 section :
  • 1. Web page construction
  • 2. Web hosting

1. Web construction.
- I want to say that, it's a SEO friendly structure for web pages construction.

2. Web hosting.
- After the web pages hosted on the WWW network, we need to ensure the web pages are listed in search engine database.

I'll discuss more on the specific post for better explanation.

Write by Arafa Daming

List of Google tools that you can use

Google always moving forward to enhance their services and performance. They are the number 1 of search engine in the world. Days by days, their provide more free and paid services that is very useful. Below is some list of Google tools that i already try and you should try too :

BilNameFunction
1.GmailEmail services
2.Google WebmasterA webmaster should use this to get their website listed on Google and to submit sitemap.
3.Google AnalyticsTo trace your website and visitor behavior.
4.Google AdwordsFor advertisement.
5.Google AdsensePlace to earn money.
6.Google PlacesListing your business/organization on Google Maps.
7.Google MapsThe world on your screen.
8.Google SitesPlace to make free web pages.

Google also offers a variety of services and tools besides its basic web search. Later, I'll discuss about above tools in this blog.
For more information visit this wiki about Google Services and Google Products

Write by Arafa Daming

Latest version of most web browsers

Arafa Daming - Best Browser


This is some of the browser in the world:

 LogoNameLatest Version
Mozilla FirefoxFirefox 4
Microsoft Internet ExplorerInternet Explorer 9
Google ChromeChrome
Apple SafariSafari 5
OperaOpera 11
SeaMonkey ProjectSeaMonkey 2
MaxthonMaxthon 3
FlockFlock 2
Space TiimeSpace Time 1
Lynx BrowserLynx 2

For your information, Netscape Navigator is officially stopped.
Which 1 your favorite browser?


Write by Arafa Daming

New Web Design Trends

Arafa Daming - Web Design Trend


The main objective of websites is to introducing/promote your business and attract traffic; gain visitors. This visitors can be converted into real customer. So, implementation of new and attractive designs bring a great help in this direction. Here are some of my opinions about web designing nowadays :

Latest languages
The latest version of web designing languages is HTML5 and CSS3, also jQuery and MooTools continuing updating their version to improving the functionality and intercept any bug. Of course this latest languages offer more advanced features to make better design and function to the web. As HTML5, it bring better structure mark-up, using CSS3 to reduce images usage in web pages that is more light and easy load, jQuery and MooTools make the web page more interactive.

Simplicity
In this case, "less is more" principal applied. This is to prevent unwanted content. Compatibility and accessibility of the web page also reliable. This will lead to make visitor more relax in reading the information.

Serif Fonts:
The last decade saw most web designers choosing either Arial or Verdana for web text. This decade is likely to make a shift to Serif fonts. This is because, many browsers use high-resolution display screens and automatically increasing visitor readability.

Huge Images
We can see oversized logos or headers for a long time now. This is to create an immediate interaction with the visitors; "images content more word"

Navigation
Most important features in web page is the navigation. Good navigation will make the visitors become easier in crawling the web page and increase the interest level. Nowadays, we can see a lot of navigation style; hovering, drop-down, pop-up etc.

Typography
Using the idea of mix and match with fonts is very interesting interesting. Rotating and modifying different old and new fonts will make the web page stand-up and meaningful. A website with typography is better than a page with photos, which takes a long time to load.

Slide Show
This is as a brief presentation to visitor. Now we can see a sideshow that more functionality. This easily attract visitors eye and good slide show will lead to increase interest level. With this, it can save a lot of space and mentioning the web page easily.

Mobile Design
Since the introduction of the iPhone in 2007 and smartest smart phones that become more popular day by day. A lot of visitor come from the smart phone browser. So, mobile version become more important as a new way in viewing web page and promoting business.

Write by Arafa Daming
Improving Google search skill

Arafa Daming - Google Searching Skill
As i say at my first post. Searching information and resources at search engine like Google, Yahoo and Bing(MSN) is very important. This will lead us to the right and usefull information. Now, we will talk about Google; the most popular search engine and how we improve our searching skill.
When we visit Google. Our main objective is to search a web pages that we want and the key is the query that we type-on. So, deciding a search queries is important. Here is the basic:

Basic Query
Arafa Damingfinding a keyword for Arafa and Daming
Arafa Blog OR Profilewill find information about Arafa Blog or Arafa Profile
"Arafa Daming Profile"will find the exact phase "Arafa Daming Profile"
+about Arafa Damingfind the word of about, arafa and daming, + sign force google no to ignore about
arafa -blogwill find only arafa
e-LabuanWill find the keyword for e-labuan, e labuan and elabuan
designer ~glossaryfind information about designer glossaries, as well as dictionary
Arafa-Damingwill find all term, whether spelled as a single word, a phrase, or hyphenated

To make your life easier, Google is the best tool.
Google as a calculator
+ – * /basic arithmetic, eg:12 + 34 - 56 * 7 / 8
% of percentage of, eg: 45% of 39
^ or **raise to a power, eg:2^5 or 2**5
old units in new unitsconvert units, eg: 200 MYR in USD, 130 lbs in kg, or 31 in hex

This is very usefull for designer and developer
Advanced Search
define:malaysiaProvide definitions for words, phrases, and acronyms from the Web.
site:paiarafa.blogspot.comSearch only one website or domain.
time:labuanDefine Labuan current time
info:paiarafa.blogspot.comFind info about a page, eg: cache: related: etc
From the list above, we can make a lot of new idea about our own website or blog like making a sitemap, improving SEO etc. For more information visit Google Guide.

Write by Arafa Daming

Hello World! My name is Arafa Daming


Arafa Daming - First Post

This is my first post as a blogger. I'm a web designer from Sabah, Malaysia and this is my personal blog. This blog will cover about web designing, web programming, Search Engine Optimazation(SEO), all about Google, graphics designing, photo manipulation and related fields.

Objective of this blog is to share information and as a reference to everyone and myself. In my opinion, nowadays, the faster way  to learn about web designing is from internet; from professional tutorial, forum board or blog. So, self search ability is important (searching on search engine skills) and eager to learn. Practicing also is the main key to success.

Special quote :
"Before you speak, listen. Before you write, think. Before you spend, earn. Before you invest, investigate. Before you criticize, wait. Before you pray, forgive. Before you quit, try. Before you retire, save. Before you die, give."
-- William A. Ward {American Anthropologist}

Write by Arafa Daming